Printing Methods
There is a vast variety of printing methods in the art of printing, understanding the methods and the processes involved can be a complicated task. Depending on how you want your outcome will depend on what printing method you design for. Printing has its limitations. Your choice of printing method could be based down to colour choice, textures, ease of production, stock, cost, access to facilities, finished product. Me and Will sat together and mind mapped all the printing methods we could come up with, we also used the internet to help find methods which we may of forgotten about or ones we haven't heard of which are relevant to the brief. Below is the methods I have researched into:
Offset Lithography
Sources:
http://en.wikipedia.org/wiki/Offset_printing
http://www.thefreedictionary.com/offset+lithography
http://graphicdesign.about.com/od/printproductionglossary/g/lithography.htm
http://computer.howstuffworks.com/offset-printing3.htm
Definition:
A printing method in which the image on a plate is offset onto a rubber blanket from which it is transferred onto the surface to be printed.
It was made in 1875 as an inexpensive method of reproducing artwork.
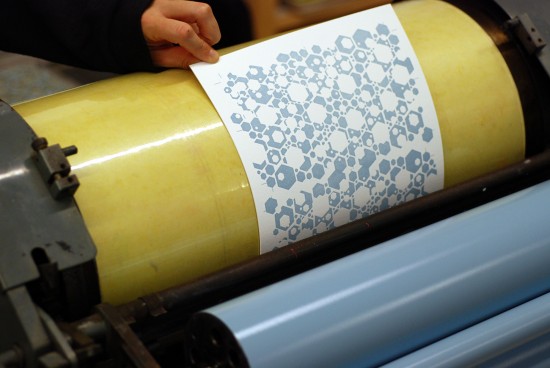
Offset printing or web offset printing is a commonly used printing technique in which the inked image is transferred (or "offset") from a plate to a rubber blanket, then to the printing surface. When used in combination with the lithographic process, which is based on the repulsion of oil and water, the offset technique employs a flat (planographic) image carrier on which the image to be printed obtains ink from ink rollers, while the non-printing area attracts a water-based film (called "fountain solution"), keeping the non-printing areas ink-free. The modern "web" process feeds a large reel of paper through a large press machine in several parts, typically for several metres, which then prints continuously as the paper is fed through.
Offset lithography is one of the most common ways of creating printed matter. A few of its common applications include: newspapers, magazines, brochures, stationery, and books. Compared to other printing methods, offset printing is best suited for economically producing large volumes of high quality prints in a manner that requires little maintenance. Many modern offset presses use computer to plate systems as opposed to the older computer to film work flows, which further increases their quality.
Advantages of offset printing compared to other printing methods include:
- Consistent high image quality. Offset printing produces sharp and clean images and type more easily than, for example, letterpress printing; this is because the rubber blanket conforms to the texture of the printing surface.
- Quick and easy production of printing plates.
- Longer printing plate life than on direct litho presses because there is no direct contact between the plate and the printing surface. Properly developed plates used with optimized inks and fountain solution may achieve run lengths of more than a million impressions.
- Cost. Offset printing is the cheapest method for producing high quality prints in commercial printing quantities.
- A further advantage of offset printing is the possibility of adjusting the amount of ink on the fountain roller with screw keys. Most commonly, a metal blade controls the amount of ink transferred from the ink trough to the fountain roller. By adjusting the screws, the gap between the blade and the fountain roller is altered, leading to the amount of ink applied to the roller to be increased or decreased in certain areas. Consequently the density of the colour in the respective area of the image is modified. On older machines the screws are adjusted manually, but on modern machines the screw keys are operated electronically by the printer controlling the machine, enabling a much more precise result.
- Slightly inferior image quality compared to rotogravure or photogravure printing.
- Propensity for anodized aluminum printing plates to become sensitive (due to chemical oxidation) and print in non-image/background areas when developed plates are not cared for properly.
- Time and cost associated with producing plates and printing press setup. As a result, very small quantity printing jobs may now use digital offset machines.
The process:
- The ink duct roller delivers ink from the ink duct to the ink pyramid, also called the Ink Train.
- The ductor roller, sometimes called a vibrator roller due to its rapid back and forth motion, transfers ink from the duct roller to the first distribution roller. It is never in contact with both rollers at the same time.
- The distribution rollers evenly distribute the ink. The first distribution roller picks up the ink from driving rollers, and the last distribution rollers transfer the ink to the form rollers.
- The transfer rollers transfer ink between the ink-absorbing and ink-delivering driving rollers.
- Driving rollers roll against the distribution rollers and either absorb or deliver ink, depending on their placement.
- Ink form rollers transfer ink from the last distribution rollers on to the printing plate.
- The printing plate transfers the ink to the offset cylinder (typically called the blanket cylinder) usually covered with a rubber “blanket.”
- The paper is then pressed against the blanket cylinder by the impression cylinder, transferring the ink onto the paper to form the printed image.
'How it works: step-by-step guide'
Step One: Pre-press Production
Before the job can be printed, the document must be converted to film and "plates." In the case of How Stuff Works Express, film negatives are created from digital files. Images from the negatives are transferred to printing plates in much the same way as photographs are developed. A measured amount of light is allowed to pass through the film negatives to expose the printing plate. When the plates are exposed to light, a chemical reaction occurs that allows an ink-receptive coating to be activated. This results in the transfer of the image from the negative to the plate.There are different materials for plates, including paper (which produces a lower-quality product). The best plate material isaluminum, which is more costly.
Each of the primary colors -- black, cyan (blue), magenta (red), and yellow -- has a separate plate. Even though you see many, many colors in the finished product, only these four colors are used (you'll also hear this called the four-color printing process -- it's a little like the three-color process used intelevision).
Step Two: The Press Run
The printing process used to print How Stuff Works Express is called web offset lithography. The paper is fed through the press as one continuous stream pulled from rolls of paper. Each roll can weigh as much as 2,000 pounds (1 ton). The paper is cut to size after printing. Offset lithography can also be done with pre-cut paper in sheetfed presses.Web presses print at very high speeds and use very large sheets of paper. Press speeds can reach up to 50,000 impressions per hour. An impression is equal to one full press sheet (38 inches x 22 and three-fourths inches), which is 12 pages of How Stuff Works Express.
Even when a 1-ton roll of paper runs out, the presses do not stop rolling. Rolls can be spliced together as the web press is running by using festoons. Festoons are a series of rollers that extend up into a tower. A few moments prior to the splice occurring, the festoons will move up into the tower, pulling in large amounts of paper. At the moment the splice occurs, the rolls of paper stop rotating for a split second, at which point the paper is taped together automatically. As the newly spliced roll begins to pick up speed, the festoons begin to drop out of the tower at a rate predetermined by the speed at which the press is operating. The press operator never has to adjust the press controls during this operation.
The press has to maintain a constant balance between the force required to move the paper forward and the amount of backpressure (resistance) that allows the paper to remain tight and flat while traveling through the equipment.
The Inking Process
Ink and water do not mix -- this is the underlying principle of offset lithography. The ink is distributed to the plates through a series of rollers. On the press, the plates are dampened, first by water rollers, then ink rollers. The rollers distribute the ink from the ink fountain onto the plates.The Offset Process
The image area of the plate picks up ink from the ink rollers. The water rollers keep the ink off of the non-image areas of the plate. Each plate then transfers its image to a rubber blanket that in turn transfers the image to the paper. The plate itself does not actually touch the paper -- thus the term "offset" lithography. All of this occurs at an extremely high speed.
The paper is left slightly wet by all of the ink and water being applied. Obviously, there is a risk of the ink smudging. The smudging is avoided by having the paper pass through an oven. The oven is gas fired, and the temperature inside runs at 350 to 400 degrees Fahrenheit (176 to 206 degrees Celsius).
Immediately after leaving the oven, the paper is run through a short series of large metal rollers that have refrigerated water flowing through them. These chill rollerscool the paper down instantly and set the ink into the paper. If this were not done, the ink would rub off on your fingers.

Color and Registration Control
Color and registration control is a process that is aided by the use of computers. Registration is the alignment of the printing plates as they apply their respective color portion of the image that is being printed. If the plates do not line up perfectly, the image will appear out of focus and the color will be wrong. A computer takes a video image of registration marks that have been placed on the press sheet. Each plate has its own individual mark. The computer reads each of these marks and makes adjustments to the position of each plate in order to achieve perfect alignment. All of this occurs many times per second while the press is running at full speed.Color control is a process that involves the way in which the ink blends together, and is tied closely to the plate registration. The amount of ink that is released into the units depends on how much ink is needed to achieve a desired look. The ink is adjusted via the control panel that is part of the overall control console. Prior to being placed on the press, the plates are scanned and the data is then transferred to a micro cassette. This serves as the "master" that directs the release of ink to pre-set values.
Step Three: Bindery
The bindery is where the printed product is completed. The huge rolls of now-printed paper are cut and put together so that the pages fall in the correct order. Pages are also bound together, by staples or glue, in this step of the process.
In the case of How Stuff Works Express, a machine called a stitcher takes the folded printed paper (called press signatures) and collates them together. Then stitches (staples) are inserted into the signatures, binding them together.
The final components in the stitcher machine are the knives, which trim the paper to the final delivered size. The product is then ready to be shipped to the end destination.
Ink used:

Offset printing uses inks that, compared to other printing methods, are highly viscous. Typical inks have a dynamic viscosity of 40–100 Pa·s.

There are many types of paste inks available for utilization in offset lithographic printing and each have their own advantages and disadvantages. These include heat-set, cold-set, and energy-curable (or EC), such as ultraviolet- (or UV-) curable, and electron beam- (or EB-) curable. Heat-set inks are the most common variety and are "set" by applying heat and then rapid cooling to catalyze the curing process. They are used in magazines, catalogs, and inserts. Cold-set inks are set simply by absorption into non-coated stocks and are generally used for newspapers and books but are also found in insert printing and are the most economical option. Energy-curable inks are the highest-quality offset litho inks and are set by application of light energy. They require specialized equipment such as inter-station curing lamps, and are usually the most expensive type of offset litho ink.
- Letterset inks are mainly used with offset presses that do not have dampening systems and uses imaging plates that have a raised image.
- Waterless inks are heat-resistant and are used to keep silicone-based plates from showing toning in non-image areas. These inks are typically used on waterless Direct Imaging presses.
- Single Fluid Inks are newer ink that uses a process allowing lithographic plates on a lithographic press without using a dampening system during the process.
Ink/water balance
Ink and water balance is an extremely important part of offset printing. If ink and water are not properly balanced, the press operator may end up with many different problems affecting the quality of the finished product, such as emulsification (the water overpowering and mixing with the ink). This leads to scumming, catchup, trapping problems, ink density issues and in extreme cases the ink not properly drying on the paper; resulting in the job being unfit for delivery to the client. With the proper balance, the job will have the correct ink density and should need little further adjustment except for minor ones. An example would be when the press heats up during normal operation, thus evaporating water at a faster rate. In this case the machinist will gradually increase the water as the press heats up to compensate for the increased evaporation of water. Printing machinists generally try to use as little water as possible to avoid these problems.
Fountain solution
Fountain solution is the water-based (or "aqueous") component in the lithographic process that moistens the non image area of the plate in order to keep ink from depositing (and thus printing). Historically, fountain solutions were acid-based and made with gum arabic, chromates and/or phosphates, and magnesium nitrate. Alcohol is added to the water to lower thesurface tension and help cool the press a bit so the ink stays stable so it can set and dry fast. While the acid fountain solution has improved in the last several decades, neutral andalkaline fountain solutions have also been developed. Both of these chemistries rely heavily on surfactants/emulsifiers and phosphates and/or silicates to provide adequate cleaning and desensitizing, respectively. Since about 2000, alkaline-based fountain solutions have become less common due to the inherent health hazards of high pH and the objectionable odor of the necessary microbiological additives.
Acid-based fountain solutions are still the most common variety and yield the best quality results by means of superior protection of the printing plate, lower dot gains, and longer plate life. Acids are also the most versatile; capable of running with all types of offset litho inks. However, because these products require more active ingredients to run well than do neutrals and alkalines, they are also the most expensive to produce. However, neutrals and, to a lesser degree, alkalines are still an industry staple and will continue to be used for most newspapers and many lower-quality inserts. In recent years alternatives have been developed which do not use fountain solutions at all (waterless printing).
Digital Printing
Sources:
http://en.wikipedia.org/wiki/Laser_printing
Modern printing methods such as laser and ink-jet printing are known as digital printing. In digital printing, an image is sent directly to the printer using digital files such as PDFs and those from graphics software such as Illustrator and InDesign. This eliminates the need for a printing plate, which is used in offset printing, which can save money and time.
Without the need to create a plate, digital printing has brought about fast turnaround times and printing on demand. Instead of having to print large, pre-determined runs, requests can be made for as little as one print. While offset printing still often results in slightly better quality prints, digital methods are being worked on at a fast rate to improve quality and lower costs.
Ink Jet printers
Inkjet printing is a type of computer printing that creates a digital image by propelling droplets of ink onto paper, plastic, or other substrates. Inkjet printers are the most commonly used type of printer, and range from small inexpensive consumer models to very large professional machines that can cost tens of thousands of dollars, or more.
Laser printers
Laser printing is an electrostatic digital printing process that rapidly produces high quality text and graphics by passing a laser beam over a charged drum to define a differentially charged image. The drum then selectively collects charged toner and transfers the image to paper, which is then heated to permanently fix the image. As with digital photocopiersand multifunction printers (MFPs), laser printers employ a xerographic printing process, but differ from analog photocopiers in that the image is produced by the direct scanning of the medium across the printer's photoreceptor.
Letterpress
Sources:
http://en.wikipedia.org/wiki/File:Letterpress.png
http://whatis.techtarget.com/definition/letterpress
http://ohsobeautifulpaper.com/2012/01/the-printing-process-letterpress-printing/
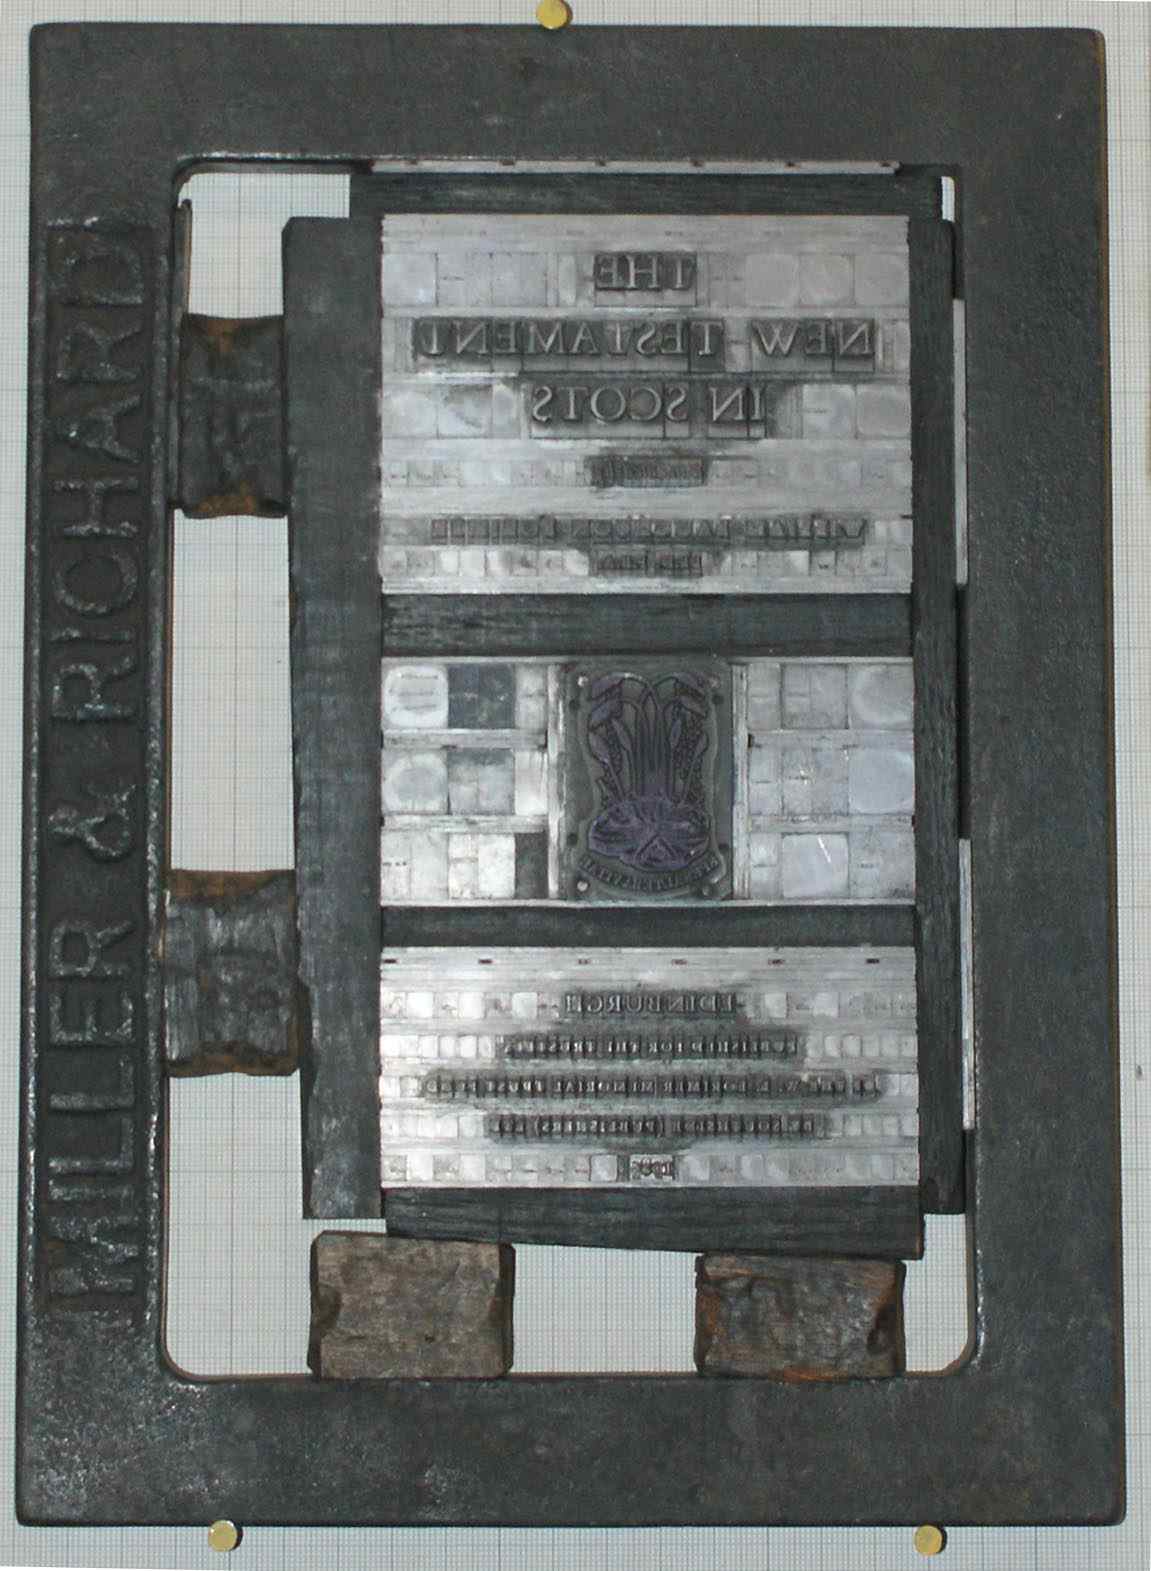
Letterpress is the oldest form of printing. In this method, a surface with raised letters is inked and pressed to the surface of the printing substrate to reproduce an image in reverse. Typically, metal type has been used but other possibilities include carved wood or stone blocks.
After the Gutenberg press introduced movable type to the process in the 15th century, letterpress was the predominant printing method for 500 years. The creation of huge rotary presses made industrial printing and newspaper production practical.
By the 1950s, xerography and offset printing began to supplant letterpress and by the end of the 20th century, digital printing and related technologies had become the industry standard for many uses. Nevertheless, letterpress is still used for some specialized commercial applications. The old method is also enjoying a resurgence among modern-day enthusiasts who prize the hand-made qualities and historical nature of letterpress print.
The process
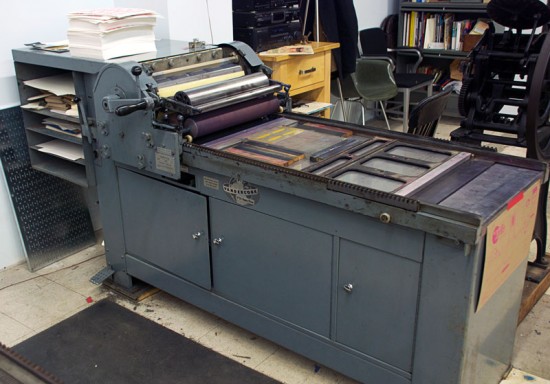
This is the Vandercook SP-20. In this press’s first life it probably pulled proofs of pages for a daily newspaper. Today, these presses are sought after for their quality and large printing size.
These are the printing plates, often blocks of separate glyphs are compiled up to create lines of text.
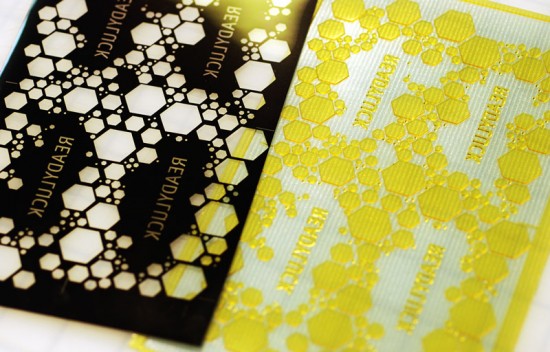
Polymer plates are produced using a photographic process. The digital design is output to a film as a negative (left), and then exposed to a polymer plate using UV light (right). The polymer plate is made of a light-sensitive, water-soluble plastic with a clear backing. The portions of the plate that are exposed through the clear parts of the film hardens, and what is not washes away. What remains is a raised surface in the shape of the design. A separate plate is produced for every color being printed, and the paper is run through the press at least once for each color in the design. We send our designs to Boxcar Press, where they transfer your digital design onto a polymer plate. These plates match a gridded Boxcar Base, a machined aluminum plate that raises the plate to type high.
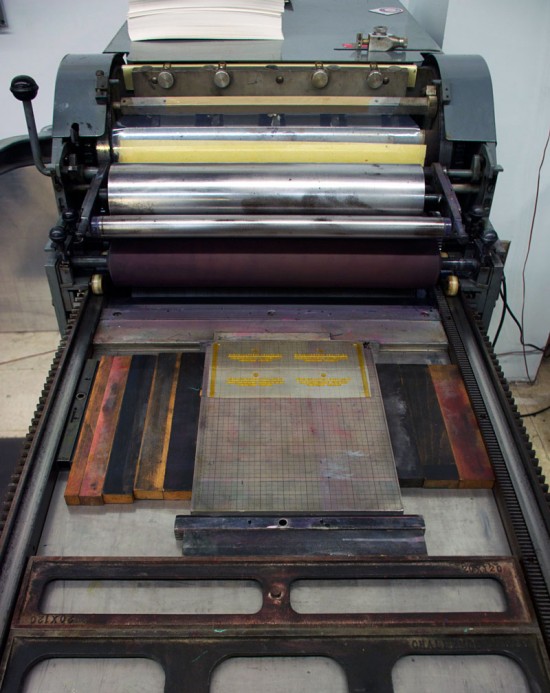
The plate is affixed to a machined metal base which is in turn locked into the press.

The press is inked. Even the inking process has to be done carefully. Too much ink will produce a sloppy print. Too little, and the color will not be solid.
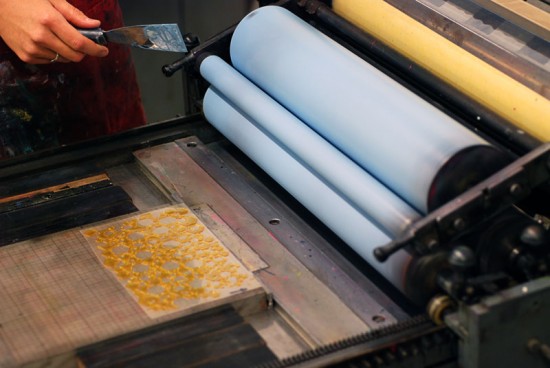
Printing begins. This plate prints an area half the size of the sheet. The sheet of paper is hand-fed through the press twice, once from each end of the paper.
More letterpress examples

As above in the images a plate has been made digitally. Original letterpresses literally just printed type. Below is a plate that would be placed into the press to print. It was a very lengthy process, everything had to be back-to-front so it would print the correct way round.
Thermographic printing
Source:
http://en.wikipedia.org/wiki/Thermographic_printing
http://en.wikipedia.org/wiki/Thermal_printing
Thermographic printing refers to two types of printing, both of which rely on heat to create the letters or images on a sheet of paper.
The simplest type is where the paper has been coated with a material that changes colour on heating. This is called thermal printing and was used in older model fax machines and is used in most shop till receipt printers. This is called direct thermal.
Thermography is also the name of a post print process that is achieved today using traditional printing methods coupled with thermography machines. Thermography machines consist of three sections connected by a through conveyor.
The first section applies thermographic/embossing powder, made from plastic resins, to the substrate (normally paper). The areas selected for raised printing are printed with slow drying pigment inks that do not contain dryers or hardeners so that they remain wet during the application of powder. This ink is dried and hardened later during the heating process.
The second section of the process is a vacuum system that removes excess powder from uninked areas of the substrate.
The third section of the process conveys the product through a radiant oven where it is exposed to temperatures of 900 to 1300 degrees Fahrenheit. The heating process takes on the order of 2.5 to 3 seconds. The substrate (usually paper) has a peak in IR absorption at the wavelength used. Through conduction from the paper, the powder temperature rapidly increases and starts melting. When the process is correctly adjusted, the center of the largest filmed areas reach sufficient quality level as the product exits the heater. The melted ink then solidifies as the product cools.
This process is sometimes produced using manual powdering. The substrate with the wet ink areas selected for the effect are dipped into the powdered polymer. The sheet is tilted back and forth, rolling the powder across the image. The excess powder is removed by raising the substrate to a vertical position and lightly tapping the back. The powdered sheet is then fed into a radiant heating system as above at a speed to achieve a quality filming. In the case of craft applications, the powder is then melted using a heatgun that blows hot air.
It is commonly used on wedding invitations, letterheads, business cards, greetings cards, gift wrap, packaging and can also be used to print braille text. It is even sometimes used in diploma printing as an attractive alternative to the more expensive engraving option.
Thermal printing
A thermal printer comprises these key components:
- Thermal head: generates heat; prints on paper
- Platen: a rubber roller that feeds paper
- Spring: applies pressure to the thermal head, causing it to contact the thermosensitive paper
- Controller boards: for controlling the mechanism
Screen Printing
Source:
http://en.wikipedia.org/wiki/Screen_printing
http://www.wikihow.com/Make-a-Screen-Print
http://www.printmojo.com/screenprinting101.php


To understand the time and care that is taken into each silk screen printed job, we thought it would be helpful to show you what happens each time we have a job to print.
The first step is you sending us your artwork when you place your order through our PrintMojo system.
Once we have the artwork, it gets sent to our art department for processing.
Once we have the artwork, it gets sent to our art department for processing.
They take a look at your printing instructions and come up with a composite proof for you so you can see what your design will look like on the t-shirts (or hats, sweatshirts, baby doll tees or other garments).
Our proofs will show you the ink colors to be used on your order, the print size dimensions for your artwork, and it will confirm the specific print locations you have instructed us to print.
At this time, you can instruct the art department to make any changes you see fit. If you'd like different ink colors used in your design, just let us know. If you'd like it to be printed smaller, just let us know.
At this time, you can instruct the art department to make any changes you see fit. If you'd like different ink colors used in your design, just let us know. If you'd like it to be printed smaller, just let us know.
We don't print your job until you are thrilled with your proof and you have specifically approved it for printing. We'll work with you until you are 100% satisfied with your design!
After the art has been approved, we need to output the film that we use to make the screens.

Turning out the lights:
All of the art is then pre-registered and checked for detail and quality:

Once the art is completely approved in-house we send the job to our screen dept.
The first step in the screen department is to coat the screens with a photosensitive emulsion
The first step in the screen department is to coat the screens with a photosensitive emulsion

Next, the screen dries, and it is placed on the vacuum light table and exposed with a 3000 watt metal halide light.


The Final Touches:
After being exposed the screens are then washed out with a pressure washer at around 1300 psi.
Once the image is washed out, it is double checked with the films for accuracy.


The Actual Printing Process:
Each color in the design needs a screen and each screen must be blocked, taped, setup, and squeegeed.
Just imagine if we had to do this each time a t-shirt was ordered. You can see why screen printing was designed to print quality garments in bulk quantities.
For smaller runs, we may use one of our manual presses. For larger runs with more colors, we use our 8 head automatic press.
By "flashing" or drying the ink between each color layer, we are able to give you bright, professional quality printing, with years of wear and tear :-)
After being exposed the screens are then washed out with a pressure washer at around 1300 psi.
Once the image is washed out, it is double checked with the films for accuracy.
The Actual Printing Process:
Each color in the design needs a screen and each screen must be blocked, taped, setup, and squeegeed.
Just imagine if we had to do this each time a t-shirt was ordered. You can see why screen printing was designed to print quality garments in bulk quantities.
For smaller runs, we may use one of our manual presses. For larger runs with more colors, we use our 8 head automatic press.
By "flashing" or drying the ink between each color layer, we are able to give you bright, professional quality printing, with years of wear and tear :-)
Blocking
 |
Tape
 |
Setup
 |
Print
 |
There you have it. Most ALL other companies charge for this process.
Woodblock Printing
Source:
http://en.wikipedia.org/wiki/Woodblock_printing
http://www.youtube.com/watch?v=dliF74ojOho
Woodblock printing is a technique for printing text, images or patterns used widely throughout East Asia and originating in China in antiquity as a method of printing on textilesand later paper. As a method of printing on cloth, the earliest surviving examples from China date to before 220, and woodblock printing remained the most common East Asian method of printing books and other texts, as well as images, until the 19th century. Ukiyo-e is the best known type of Japanese woodblock art print. Most European uses of the technique for printing images on paper are covered by the art term woodcut, except for the block-books produced mainly in the 15th century.
Process
The image is drawn onto a block of wood and carefully handcrafted out of the wood

Ink is brushed onto the wood carving

It's brushed over with rice paste

It is then brushed with an inking brush

Paper is position on the wood


The print is then taken from the wood onto the paper. To print full colour prints each block has to have a different colour. The colours are then layered up to create a full colour image. To make sure the paper is lined up correctly each time, guides have been drawn.

This is the print after several colours have been applied

Etching
Source:
http://en.wikipedia.org/wiki/Etching
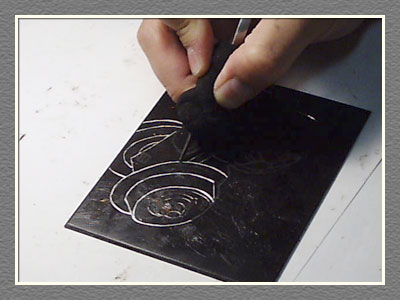
Etching is the process of using strong acid or mordant to cut into the unprotected parts of a metal surface to create a design in intaglio in the metal (the original process—in modern manufacturing other chemicals may be used on other types of material). As an intaglio method of printmaking, it is, along with engraving, the most important technique for old master prints, and remains in wide use today.
In pure etching, a metal (usually copper, zinc or steel) plate is covered with a waxy ground which is resistant to acid. The artist then scratches off the ground with a pointed etching needle where he or she wants a line to appear in the finished piece, so exposing the bare metal. The échoppe, a tool with a slanted oval section, is also used for "swelling" lines. The plate is then dipped in a bath of acid, technically called the mordant (French for "biting") or etchant, or has acid washed over it. The acid "bites" into the metal, where it is exposed, leaving behind lines sunk into the plate. The remaining ground is then cleaned off the plate. The plate is inked all over, and then the ink wiped off the surface, leaving only the ink in the etched lines.
The plate is then put through a high-pressure printing press together with a sheet of paper (often moistened to soften it). The paper picks up the ink from the etched lines, making a print. The process can be repeated many times; typically several hundred impressions (copies) could be printed before the plate shows much sign of wear. The work on the plate can also be added to by repeating the whole process; this creates an etching which exists in more than one state.
I used etching quite a lot whilst in college so I am familiar with the process. The images below show some of the stages (these images are not my own)
The plate below is covered with a 'waxy ground' and the desired image is etched into it.
The plate is then dipped into a specific acid for several minutes, which eat away at the etched image.

Ink is then painted or rolled on

The image is then pressed onto paper either using your hands or a printing press

Monoprint
Source
http://en.wikipedia.org/wiki/Monoprinting
http://www.monoprints.com/monoprints.php
Mono printing is a form of printmaking that has images or lines that can only be made once, unlike most printmaking, where there are multiple originals. There are many techniques of monoprinting. Examples of standard printmaking techniques which can be used to make monoprints include lithography, woodcut, and etching.
A monoprint is a single impression of an image made from a reprintable block. Such as a metal plate used for etching, a litho stone or wood block. Rather than printing an edition of multiple copies of a single image, only one impression may be produced, either by painting or making a collage on the block. Etching plates may also be inked in a way that is expressive and unique in the strict sense, in that the image cannot be reproduced exactly. Monoprints may also involve elements that change, where the artist reworks the image in between impressions or after printing so that no two prints are absolutely identical. Monoprints may include collage, hand-painted additions, and a form of tracing by which thick ink is laid down on a table, paper is placed on top and is then drawn on, transferring the ink onto the paper. Monoprints can also be made by altering the type, color, and pressure of the ink used to create different prints.
Monoprints are known as the most painterly method among the printmaking techniques; it is essentially a printed painting. The characteristic of this method is that no two prints are alike. The beauty of this medium is also in its spontaneity and its combination of printmaking, painting and drawing media.
Process

1 - The artist is rolling out a flat area of ink with a roller on a previously etched plate (you can see the lines of the image below).

2 - Using a cloth, the artist is removing the ink from the plate to form fresh, spontaneous images. If the artist feels that too much ink was removed, this can be reapplied with brushes.

3 - texturizing the ink with fabric

example
Foil stamping
Source
http://en.wikipedia.org/wiki/Foil_stamping
Foil stamping, typically a commercial print process, is the application of pigment or metallic foil, often gold or silver , but can also be various patterns or what is known as pastel foil which is a flat opaque color or white special film-backed material, to paper where a heated die is stamped onto the foil, making it adhere to the surface leaving the design of the die on the paper. Foil stamping can be combined with embossing to create a more striking 3D image.
The foil stamping or hot stamping process (as it is called when heat is applied) is accomplished with the use of a metal plate that has been engraved with an image of the desired design required for the particular application. The plate strikes a roll of foil film, which causes the foil to adhere to the plate. The metal plate then strikes the substrate that is to be imprinted and transfers the foil onto the area of the document requiring the metallic effect. The result is a document that has a highly reflective image with a bright and dense metallic appearance.
A wide selection of foil colors, finishes, and effects are available for foil stamped documents. Standard gold and silver metallic finishes are most often used, but a wide range of other colors are used to provide a reflective metallic effect. Marble, leather, wood, snakeskin, and pearl effects are among the variety of finishes that are available and other effects, such as geometric multidimensional patterns, are used for a wide range of digitally printed documents.

Rotogravure
Source:
http://en.wikipedia.org/wiki/Rotogravure
Rotogravure (Roto or Gravure for short) is a type of intaglio printing process, which involves engraving the image onto an image carrier. In gravure printing, the image is engraved onto a cylinder because, like offset printing and flexography, it uses a rotary printing press. Once a staple of newspaper photo features, the rotogravure process is still used for commercial printing of magazines, postcards, and corrugated (cardboard) product packaging.
In direct image carriers such as gravure cylinders, the ink is applied directly to the cylinder and from the cylinder it is transferred to the substrate
While the press is in operation, the engraved cylinder is partially immersed in the ink fountain, filling the recessed cells. As the cylinder rotates, it draws ink out of the fountain with it. Acting as a squeegee, the doctor blade scrapes the cylinder before it makes contact with the paper, removing excess ink from the non-printing (non-recessed) areas and leaving in the cells the right amount of ink required: this tool is located quite close to the paper so that the ink left in the cells does not have enough time to dry. Next, the paper gets sandwiched between the impression roller and the gravure cylinder: this is where the ink gets transferred from the recessed cells to the paper. The purpose of the impression roller is to apply force, pressing the paper onto the gravure cylinder, ensuring even and maximum coverage of the ink. The capillary action of the substrate and the pressure from impression rollers force the ink out of the cell cavity and transfer it to the substrate. Then the paper goes through a dryer because it must be completely dry before going through the next color unit and absorbing another coat of ink.

The major advantage of Gravure is that it can print very long runs due to its confi guration. Sear advertising, for example, can count into the millions of printed pieces. Unlike offset, Gravure uses a metal printing cylinder can handle these types of long jobs without wearing out the printing cylinder. Money and postage stamps are also printed using a form of Gravure (Intaglio).
Spot varnish/ UV coating
source:
http://www.pulseprint.co.uk/article/special_finishes_spot_uv/
http://www.shropshireprinter.com/spot-gloss-uv-varnish.html
Spot varnishing is used to highlight images with matt or gloss varnish against unvarnished areas, which leads to an enhanced visual impression. Spot varnishing can be done on an IR or UV basis.
A varnish applied only to portions of a printed piece after printing, rather than to the entire sheet, typically for aesthetic purposes. Spot varnishing is commonly found on book covers, in which only portions of the cover are high in gloss, in contrast to the surrounding matte texture.
- Varnish: is essentially a clear ink that can be applied in a variety of thicknesses over print. On the most basic level it improves the durability of your print, preventing the ink from rubbing off and keeping the paper or card from wrinkling or tearing, but as we’ll see below it can also be used to achieve some awesome visual and textural effects.
- Finish: is any effect that’s applied to your print after it’s been produced. That could be an all over varnish, a spot varnish, foil-blocking, or die-cuts (all of which I’m sure we’ll get to in a later post!)
- Spot: is used to indicate that a finish is only going to be applied to certain areas (or spots) of the total printed area.
- UV: is the thickest varnish available, and is most often used to make your print look really glossy and vivid.
Ultra Violet (UV) varnishing is great at enhancing many kinds of print job with a high gloss finish; it can be applied as either an all-over coating or as a spot varnish.
UV varnish is a liquid laminate that is bonded and cured with ultraviolet light and requires the use of special ultraviolet drying machinery and the varnish is applied to the required areas.
Spot UV has the affect of highlighting and drawing attention to that part of the design, but it also provides the additional visual stimulus of having varied textures on a single printed surface. One very effective technique is to apply a UV gloss spot varnish on top of matt laminated printing. This achieves maximum contrast between the highly reflective shiny UV coating and the light-absorbing matt laminate, and can, for instance, create a striking first impression.
|


Flexography
source:
http://en.wikipedia.org/wiki/Flexography
http://www.pneac.org/printprocesses/flexography/
Flexography (often abbreviated to flexo) is a form of printing process which utilizes a flexible relief plate. It is essentially a modern version of letterpress which can be used for printing on almost any type of substrate, including plastic, metallic films, cellophane, and paper. It is widely used for printing on the non-porous substrates required for various types of food packaging (it is also well suited for printing large areas of solid colour).


Source:
http://en.wikipedia.org/wiki/Linocut
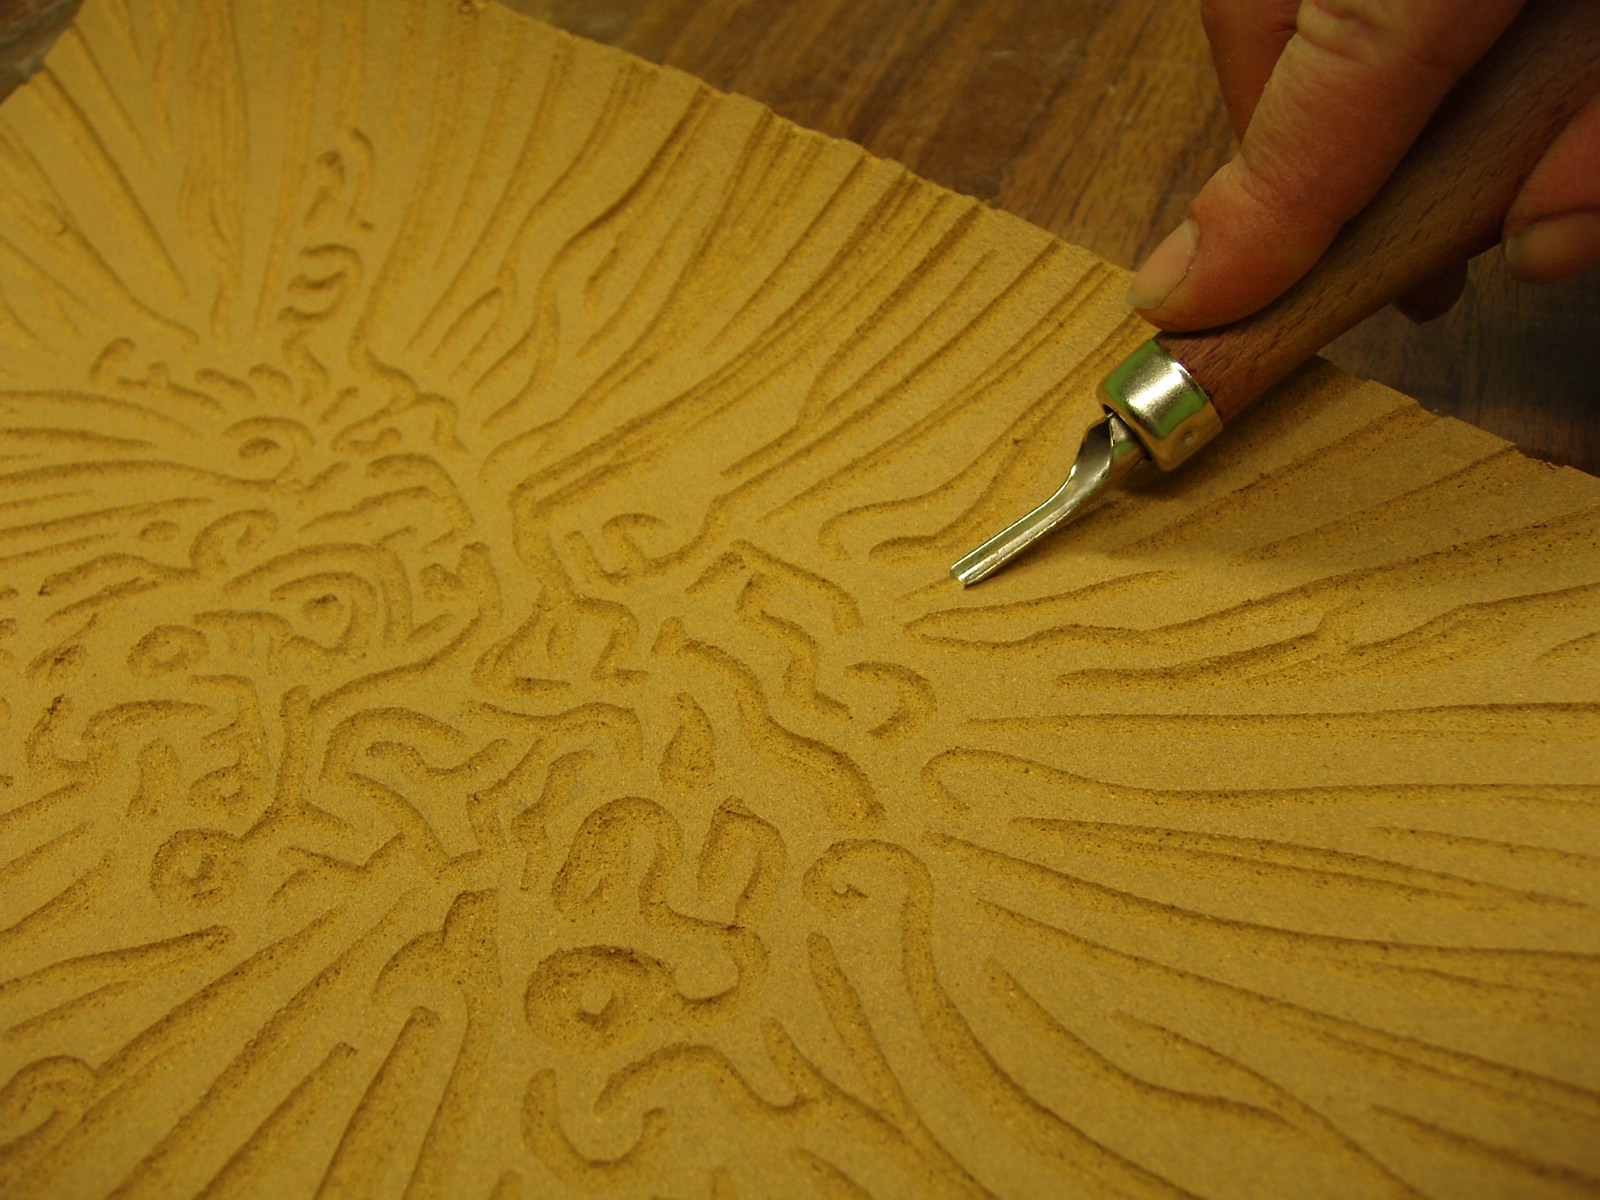
Linocut is a printmaking technique, a variant of woodcut in which a sheet of linoleum (sometimes mounted on a wooden block) is used for the relief surface. A design is cut into the linoleum surface with a sharp knife, V-shaped chisel or gouge, with the raised (uncarved) areas representing a reversal (mirror image) of the parts to show printed. The linoleum sheet is inked with a roller (called a brayer), and then impressed onto paper or fabric. The actual printing can be done by hand or with a press.


Mono printing
Source:
http://www.youtube.com/watch?v=ajx3d7PTm68
http://en.wikipedia.org/wiki/Monoprinting


Place your desired stock on top and roll through the press


You are left with the printed image on the stock

Examples


Photo etching/ Embossing
I went to vernon street for an induction of photo etching and embossing which was really helpful. We didn't physically produce any work but we were shown the process and how to do it.
There is two types of embossing, negative and positive. If you are wanting a positive emboss it's best to use wood. If you are making a negative emboss it's best to use copper.
The photo etching process allows you to use your photo etching to then emboss. Obviously if you're using wood all you need is to laser cut your design onto the wood and then just use the hydraulic pressure machine at vernon street to emboss.
For the session we were shown how to make the photo etching/ text etching in preparatory for the negative embossing stage.
Things to know:
> Dont photo etch text below 10 pt
> It takes about 7 hours for the image to be etched and it takes about 10 minutes to firmly emboss
> If you use small text the negative spaces can often join up distorting the letters
> If you want a lot of depth you are going to loose clarity, but if you want clarity you are going to loose depth
> Bold type that is structured works well
> The more copper the longer it takes
> Use wood that is small than 3mm
First of all you need to print your image (use halftones) or text in black and white onto acetate.
You need to sand down your copper plate degrease it then rinse it off. Dry the copper plate by blotting it.
You then cover your copper board with a light sensitive screen, the outside is glossy the inside is semi matte.
Remove the semi matte layer and place onto your copper plate, cover it with a plain sheet of acetate and roll it through the roller making sure its all smooth. This is to stick the light sensitive screen to the copper. When you've rolled through once, turn the copper 90 degrees and roll back through.
Trim off the rest of the film.
If you are etching text don't reverse it before printing as during the process it is flipped twice anyway.
Tape your acetate to the copper with the sensitive film (use magic tape as light can pass through it) and place it into the light box. The machine setting has to be put to nine light units when using acetate.
You then need to peel off the acetate and the film layer and place the copper plate into a solution, which is made up by the tutors at vernon street.
The solution is 10g of sodium carbonate to 1ltr of water.
Wipe a sponge over it every 30 seconds to get rid of remaining film until the copper is revealed.
Take the image out and blot straight away.
The image from the acetate is then left on the copper in the form of the film coating.
The image is placed back into the light box for post hardening.
The plate is then put into the acid for up to 7- 8 hours. You need to tape the back up so the acid doesn't eat away at the copper on the back, and can only eat away at the copper which is exposed at the front.
When the etching has finished your pattern/ image/ text should be etched into the plate.
You can then place the copper into the press on a hard surface (surface provided)
place your stock on top then place a sheet of newsprint on top of that. The image is then tightened into the machine and pressed using hydraulic fluid, leaving your etched text or image embossed into your stock!
source:
http://en.wikipedia.org/wiki/Flexography
http://www.pneac.org/printprocesses/flexography/
Flexography (often abbreviated to flexo) is a form of printing process which utilizes a flexible relief plate. It is essentially a modern version of letterpress which can be used for printing on almost any type of substrate, including plastic, metallic films, cellophane, and paper. It is widely used for printing on the non-porous substrates required for various types of food packaging (it is also well suited for printing large areas of solid colour).
Originally, flexographic printing was rudimentary in quality. Labels requiring high quality have generally been printed using the offset process until recently. Since 1990,[2] great advances have been made to the quality of flexographic printing presses, printing plates and printing inks.
The greatest advances in flexographic printing have been in the area of photopolymer printing plates, including improvements to the plate material and the method of plate creation.
Digital direct to plate systems have been a good improvement in the industry recently. Companies like Asahi Photoproducts, AV Flexologic, Dupont, MacDermid, Kodak and Esko have pioneered the latest technologies, with advances in fast washout and the latest screening technology.
Laser-etched ceramic anilox rolls also play a part in the improvement of print quality. Full-color picture printing is now possible, and some of the finer presses available today, in combination with a skilled operator, allow quality that rivals the lithographic process. One ongoing improvement has been the increasing ability to reproduce highlight tonal values, thereby providing a workaround for the very high dot gain associated with flexographic printing.
Image Preparation
Image preparation begins with camera-ready (mechanical) art/copy or electronically produced art supplied by the customer. Images are captured for printing by camera, scanner or computer. Components of the image are manually assembled and positioned in a printing flat when a camera is used. This process is called stripping. When art/copy is scanned or digitally captured the image is assembled by the computer with special software. A simple proof (brown print) is prepared to check for position and accuracy. When colour is involved, a colour proof is submitted to the customer for approval.
Flexographic Plate Making
Flexographic and letterpress plates are made using the same basic technologies utilizing a relief type plate. Both technologies employ plates with raised images (relief) and only the raised images come in contact with the substrate during printing. Flexographic plates are made of a flexible material, such as plastic, rubber or UV sensitive polymer (photopolymer), so that it can be attached to a roller or cylinder for ink application. There are three primary methods of making flexographic plates; photomechanical, photochemical and laser engraved plates.
Flexographic Printing Presses
Flexographic Inks
Flexographic inks are very similar to packaging gravure printing inks in that they are fast drying and have a low viscosity. The inks are formulated to lie on the surface of nonabsorbent substrates and solidify when solvents are removed. Solvents are removed with heat, unless U.V. curable inks are used.
Finishing
After printing, the substrate may run through a number of operations to be "finished" and ready for shipment to the customer. Finishing may include operations such as coating, cutting, folding and binding.
Transfer Print
Source
Transfer printing is a particularly English form of ceramic decoration. Although printing on paper existed for centuries, it was the enterprising English engraver and printer who saw its potential as a means of decorating the hard, shiny surface of pots. It is not possible to credit one individual with the sudden flash of inspiration that led to transfer printing on pottery. Rather, there seems to have been a general interest in expanding the use of printing techniques and adapting them to produce a wider range of decorative processes in the nation's growing industries.
Transfer printing in textiles
Transfer Printing in Textiles involves transferring the design on a paper to a fabric by vaporization. There are two main processes for this; the first one is Dry Heat Transfer Printing and Wet Heat Transfer Printing. In normal Heat Transfer Printing, an electrically heated cylinder is used that presses a fabric against a printed paper placed on a heat resistant blanket. The Wet Heat Transfer Printing uses heat in a wet atmosphere that is used for vaporizing the dye pattern from paper to fabric.
Collagraph
Source:
http://vimeo.com/50941703
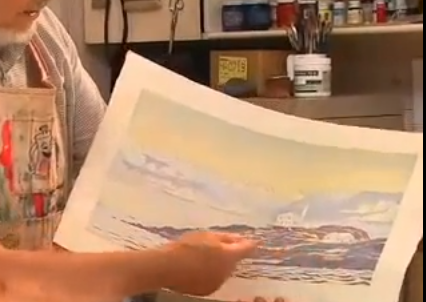
http://painting.about.com/od/makingartgicleeprints/ss/art-printmaking_4.htm
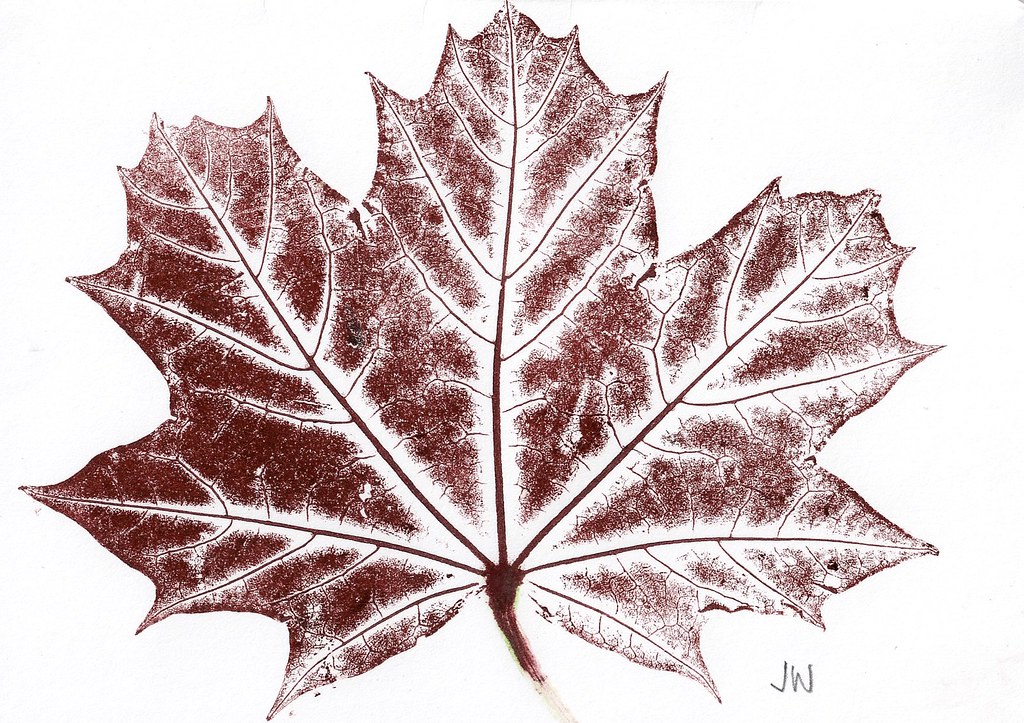
Think "collage" when you think "collagraph" and you've got the key to this style of printmaking. A collagraph is a print made from a plate that's built up from anything you can stick down onto a base of cardboard or wood. (The word comes from the French colle, meaning to stick or glue.) The materials you use to create your collagraph plate create textures and shapes, while how you ink the plate adds tone to the print.
A collagraph can be printed as a relief (inking the top surfaces only) or intaglio (inking the recesses) or a combination. The method you use will influence what you use to create your collagraph as intaglio printing requires far more pressure. If something squashes under pressure, the result can be quite different to what you expected
Starting with a piece of mount board:

Cut into the mount board, or stick objects onto the mount board. Using different materials with different textures to create different effects:


You then varnish your image so it all holds together:

Rub ink into the image making sure you cover the whole surface:


The image is then placed onto a printing press and the desired stock is placed on top, before being rolled through the press:


3D Printing
Source:
3D printing isn't exactly the right type of printing for what I'm looking at, I'd consider it more of a construction than a print.
'Additive manufacturing or 3D printing is a process of making a three-dimensional solid object of virtually any shape from a digital model. 3D printing is achieved using an additive process, where successive layers of material are laid down in different shapes. 3D printing is also considered distinct from traditional machining techniques, which mostly rely on the removal of material by methods such as cutting or drilling (subtractive processes).
Though the printer-produced resolution is sufficient for many applications, printing a slightly oversized version of the desired object in standard resolution, and then removing material with a higher-resolution subtractive process can achieve greater precision.
Some additive manufacturing techniques are capable of using multiple materials in the course of constructing parts. Some are able to print in multiple colors and color combinations simultaneously. Some also utilize supports when building. Supports are removable or dissolvable upon completion of the print, and are used to support overhanging features during construction.'


Lino printing/ Lino cut
Source:
http://en.wikipedia.org/wiki/Linocut
Linocut is a printmaking technique, a variant of woodcut in which a sheet of linoleum (sometimes mounted on a wooden block) is used for the relief surface. A design is cut into the linoleum surface with a sharp knife, V-shaped chisel or gouge, with the raised (uncarved) areas representing a reversal (mirror image) of the parts to show printed. The linoleum sheet is inked with a roller (called a brayer), and then impressed onto paper or fabric. The actual printing can be done by hand or with a press.


Mono printing
Source:
http://www.youtube.com/watch?v=ajx3d7PTm68
http://en.wikipedia.org/wiki/Monoprinting
A monoprint is a single impression of an image made from a reprintable block. Such as a metal plate used for etching, a litho stone or wood block. Rather than printing an edition of multiple copies of a single image, only one impression may be produced, either by painting or making a collage on the block. Etching plates may also be inked in a way that is expressive and unique in the strict sense, in that the image cannot be reproduced exactly.Monoprints may also involve elements that change, where the artist reworks the image in between impressions or after printing so that no two prints are absolutely identical.Monoprints may include collage, hand-painted additions, and a form of tracing by which thick ink is laid down on a table, paper is placed on top and is then drawn on, transferring the ink onto the paper. Monoprints can also be made by altering the type, color, and pressure of the ink used to create different prints.
Monoprints are known as the most painterly method among the printmaking techniques; it is essentially a printed painting.The characteristic of this method is that no two prints are alike. The beauty of this medium is also in its spontaneity and its combination of printmaking, painting and drawing media.
Process
Apply ink to a glass plate

Place your inked glass plate onto a second, bigger glass plate on a printing press

Add material, either painted or not


Place your desired stock on top and roll through the press
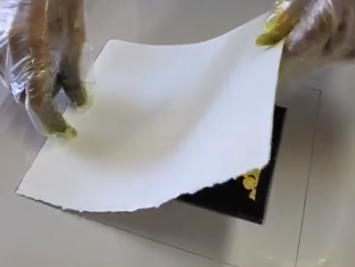

You are left with the printed image on the stock

Examples

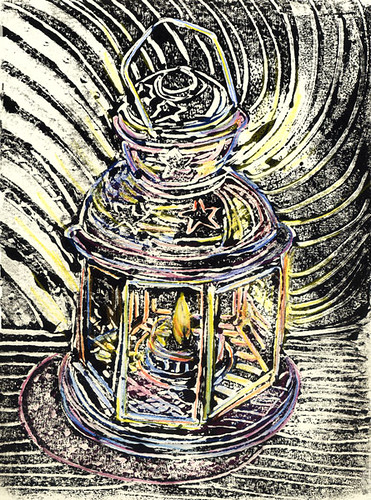
Photo etching/ Embossing
I went to vernon street for an induction of photo etching and embossing which was really helpful. We didn't physically produce any work but we were shown the process and how to do it.
There is two types of embossing, negative and positive. If you are wanting a positive emboss it's best to use wood. If you are making a negative emboss it's best to use copper.
The photo etching process allows you to use your photo etching to then emboss. Obviously if you're using wood all you need is to laser cut your design onto the wood and then just use the hydraulic pressure machine at vernon street to emboss.
For the session we were shown how to make the photo etching/ text etching in preparatory for the negative embossing stage.
Things to know:
> Dont photo etch text below 10 pt
> It takes about 7 hours for the image to be etched and it takes about 10 minutes to firmly emboss
> If you use small text the negative spaces can often join up distorting the letters
> If you want a lot of depth you are going to loose clarity, but if you want clarity you are going to loose depth
> Bold type that is structured works well
> The more copper the longer it takes
> Use wood that is small than 3mm
First of all you need to print your image (use halftones) or text in black and white onto acetate.
You need to sand down your copper plate degrease it then rinse it off. Dry the copper plate by blotting it.
You then cover your copper board with a light sensitive screen, the outside is glossy the inside is semi matte.
Remove the semi matte layer and place onto your copper plate, cover it with a plain sheet of acetate and roll it through the roller making sure its all smooth. This is to stick the light sensitive screen to the copper. When you've rolled through once, turn the copper 90 degrees and roll back through.
Trim off the rest of the film.
If you are etching text don't reverse it before printing as during the process it is flipped twice anyway.
Tape your acetate to the copper with the sensitive film (use magic tape as light can pass through it) and place it into the light box. The machine setting has to be put to nine light units when using acetate.
You then need to peel off the acetate and the film layer and place the copper plate into a solution, which is made up by the tutors at vernon street.
The solution is 10g of sodium carbonate to 1ltr of water.
Wipe a sponge over it every 30 seconds to get rid of remaining film until the copper is revealed.
Take the image out and blot straight away.
The image from the acetate is then left on the copper in the form of the film coating.
The image is placed back into the light box for post hardening.
The plate is then put into the acid for up to 7- 8 hours. You need to tape the back up so the acid doesn't eat away at the copper on the back, and can only eat away at the copper which is exposed at the front.
When the etching has finished your pattern/ image/ text should be etched into the plate.
You can then place the copper into the press on a hard surface (surface provided)
place your stock on top then place a sheet of newsprint on top of that. The image is then tightened into the machine and pressed using hydraulic fluid, leaving your etched text or image embossed into your stock!
Very Good Blog ! I will share it to my friends.
ReplyDeleteRotta Print India Private limited
Web offset machine manufacturers
Web offset printing machine supplier
Web offset printing machine manufacturers
Web offset printing machine
Web offset printing press
Web offset Printing Machines India
Offset Printing Machine Manufacturer
Book printing machine
Book Printing Machines India
Four color non-woven Bag Printing Machine Manufacturer
Mini Offset printing machine supplier
Mini Offset printing machine manufacturer
Non-woven bag printing machine manufacturer
Multi-color non-woven bag printing machine
Two color non-woven Bag Printing Machine
Newspaper printing machines manufacturers
Newspaper printing machines
Newspaper Printing Machines India
Printing Machine for Newspaper
Non-woven bag making machine manufacturer
Non-woven bag making machine
Non-woven bag printing machine supplier
Rotta speed web offset
4 hi tower
Web offset
4 Hi Printing Machine Manufacturers
4 hi tower machine
4 Hi Printing Machines